Gone are the days of flipping through a physical planner, searching for an available time slot.
Whether it’s a doctor’s appointment, a business meeting, or a social engagement — having a seamless and efficient way to schedule these commitments is essential to leading a productive and organized life. Modern-day appointment scheduling apps can help individuals and businesses manage their appointments and bookings more efficiently.
In this blog, we will review some of the best appointment apps and investigate why they are popular. We will also guide you through the entire process of building the app and highlight the key components you need to consider to develop a successful, user-friendly appointment app.
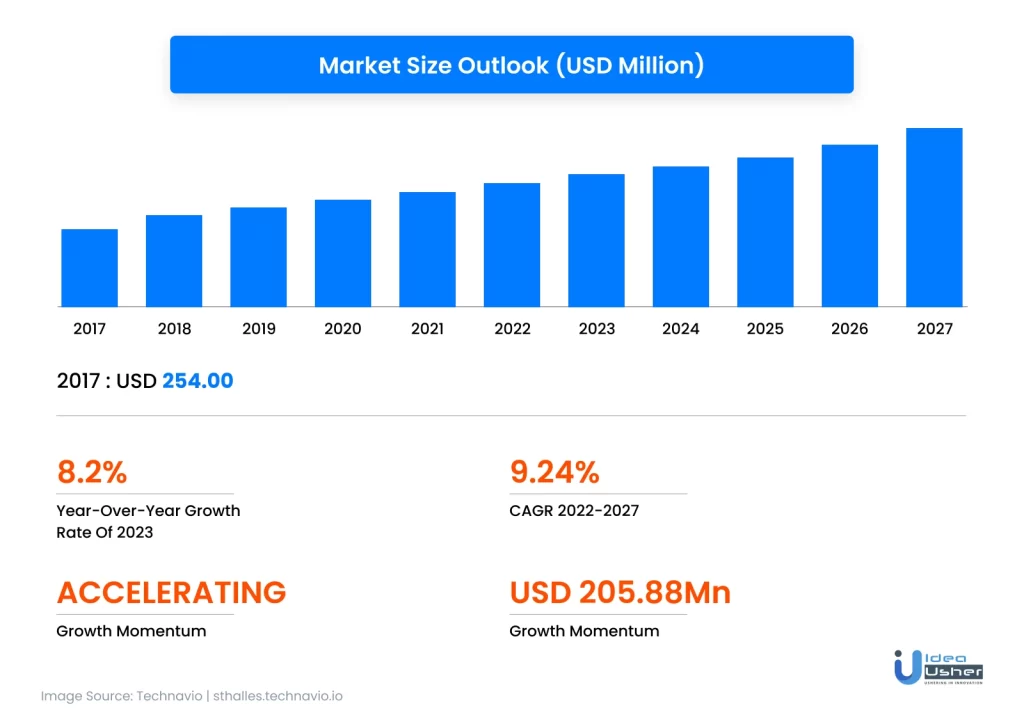
The global appointment app market is expected to have a CAGR of 9.24% between 2022 to 2027. The market was valued at $265 million in 2019 but is expected to grow to a considerable $460.88 million by 2027, an increase of over $190.88 million.
Reviewing The Best Scheduling Apps of 2023 (As per Forbes Advisor)
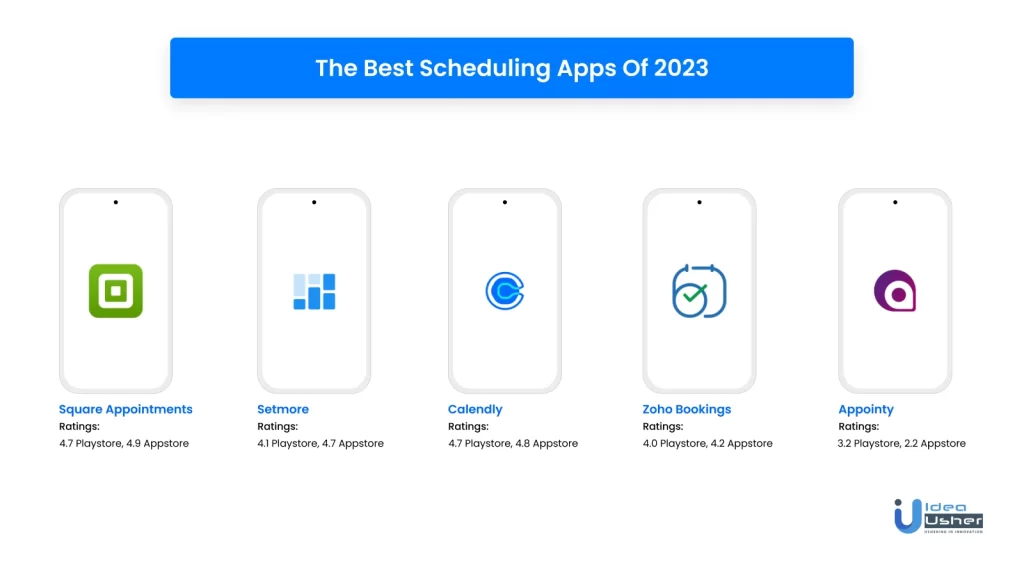
1. Square Appointments
Ratings: 4.7 Playstore, 4.9 Appstore
Square Appointments is a scheduling app developed by Square, a well-known payment processor.
The app offers integration with Square, allowing appointments to be paid for during the booking process, and even includes the option to charge late cancellation and no-show fees. It is accessible through iOS and Android apps and allows customers to book appointments directly into the calendar. Square Appointments also integrates with Instagram and Google, making it easy to advertise and book appointments through these platforms.
The app offers three plans, priced per location basis, starting from a free plan for single locations to a Premium plan for larger businesses with complex booking needs. Square Appointments is ideal for business owners looking for a central solution for managing clients, payments, and calendars.
2. Setmore
Ratings: 4.1 Playstore, 4.7 Appstore
Setmore is a top scheduling app known for its premium plans and unlimited appointments included in its free plan. It is a cost-effective solution for businesses with a high volume of appointments who need a basic scheduling app.
The app offers three plans, with monthly or annual billing options, starting from a free plan with basic features such as unlimited appointments and payment reminders to a Pro plan designed for larger teams. The Premium plan, available for $5 to $9 per user per month, offers SMS reminders, calendar sync, and multiple payment processing options.
This app is ideal for businesses on a budget or those needing to schedule a high volume of appointments and accept payments.
3. Calendly
Ratings: 4.7 Playstore, 4.8 Appstore
Calendly is a premier scheduling app that offers solutions to businesses globally. Its free plan features a web portal and mobile app, unlimited one-on-one events, and automatic event notifications (text notifications available with paid service).
The app integrates with leading conferencing platforms, such as Google Meet, GoToMeeting, and Microsoft Teams, as well as Slack and Intercom, for seamless workflows.
The Essentials plan is $8 per user per month, and the Professional plan, the most popular option, is $12 per user per month with annual billing. The Professional plan offers team event scheduling, confirmation page links, and reporting, with increased calendar connections.
The app is a great choice for businesses looking to book appointments via email and scale appointment booking and integrations over time.
4. Zoho Bookings
Ratings: 4.0 Playstore, 4.2 Appstore
Zoho Bookings is a cloud-based scheduling platform by Zoho. The app offers customers access to a sign-up portal, and businesses can have their booking page hosted on their own domain, enabling customers to book resources beyond just appointments, such as equipment and rooms.
Zoho offers three plans for its bookings app – Free Forever, Basic, and Premium. The Basic plan costs $6/user/month (billed annually) or $8/user/month (billed monthly) and includes email notifications, calendar sync with Zoho, Google, Microsoft 365, and Outlook, and resource allocation.
The Premium plan, priced at $9/user/month (annually) or $12/user/month (monthly), includes all the Basic plan features plus additional sign-up portal-hosted booking page facilities on personal domains.
The app is ideal for businesses that book more than just services and need to book resources effortlessly.
5. Appointy
Ratings: 3.2 Playstore, 2.2 Appstore
The last Appointy is majorly a workflow automation-focused scheduling app. It has four different pricing plans, starting with a free plan.
The free plan integrates with Google Calendar and Square Payments and allows for over 1,000 Zapier integrations to automate workflows. However, the number of appointments is limited to 100 per month.
For a higher monthly limit of 2,000 appointments, Appointy offers the Growth plan for $19.99 per month. The Professional plan, which costs $49.99 per month, is best for businesses with up to 5 team members and includes the ability to purchase gift certificates and schedule resources.
The Enterprise plan provides text customization at $79.99 per month and removes all Appointy branding.
As stated before, the app is ideal for those who need to keep workflows organized with many integrations.
Essential Features of an Appointment App
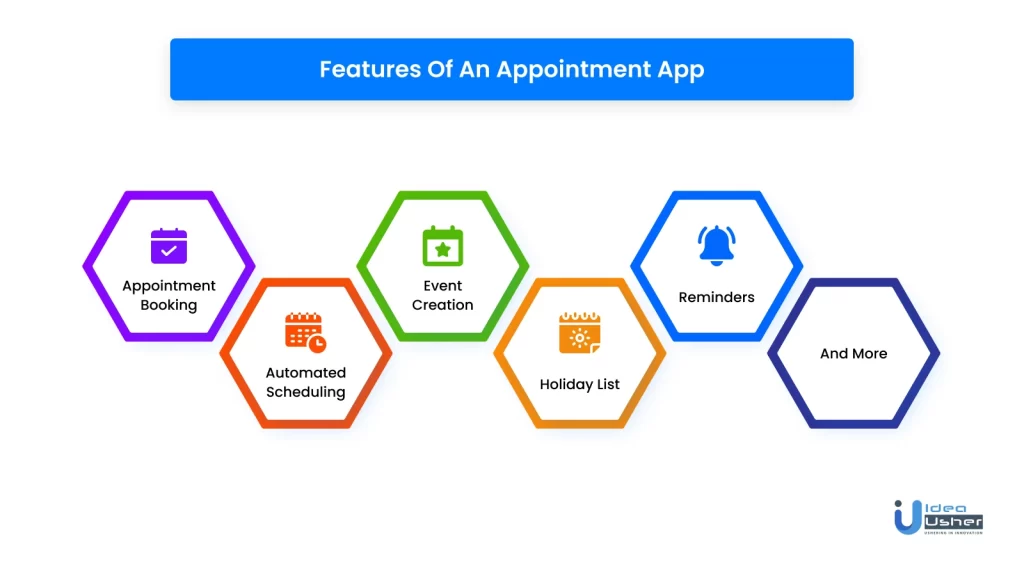
There are tons of features and functionalities that you can choose to incorporate into your appointment app. Below we have listed some of the most important features that should exist in an appointment app:
- Event creation – Create new events, tasks, webinars, etc.
- Appointment booking – Book appointments from anywhere easily.
- Time zone support – The app will have time clocks for different time zones.
- Editing capability – Edit existing appointments, tasks, and events.
- Schedule templates – Get schedule templates for various types of events.
- Automated scheduling – Automation capabilities to create the optimal work schedule.
- User-friendly workflow – Easy-to-use and comprehensible workflow.
- Resource scheduling – Use scheduling tools embedded inside to book resources such as meeting rooms.
- Availability view – Ability to check for available time slots of individual team members.
- Resource availability – Free time slot display options for resources like meeting rooms.
- Time off management – Mark days or hours as time off.
- Holiday list – List of local/regional/national/international holidays.
- No-show tracking – Track no-shows from employees, clients, and customers.
- Reminders – Send reminders via email, SMS, and in-app messaging.
- Double booking prevention – Prevent double booking within the same time slot/date/day.
- Push notifications – Get push notification service.
- Integration – Integrated working with popular software products like Gmail, Excel, etc.
- In-app purchases – In-app purchase options for additional income.
- Payment gateway integration – Integration of popular payment gateways like PayPal and Stripe.
Step-By-Step Guide for Building an Appointment App
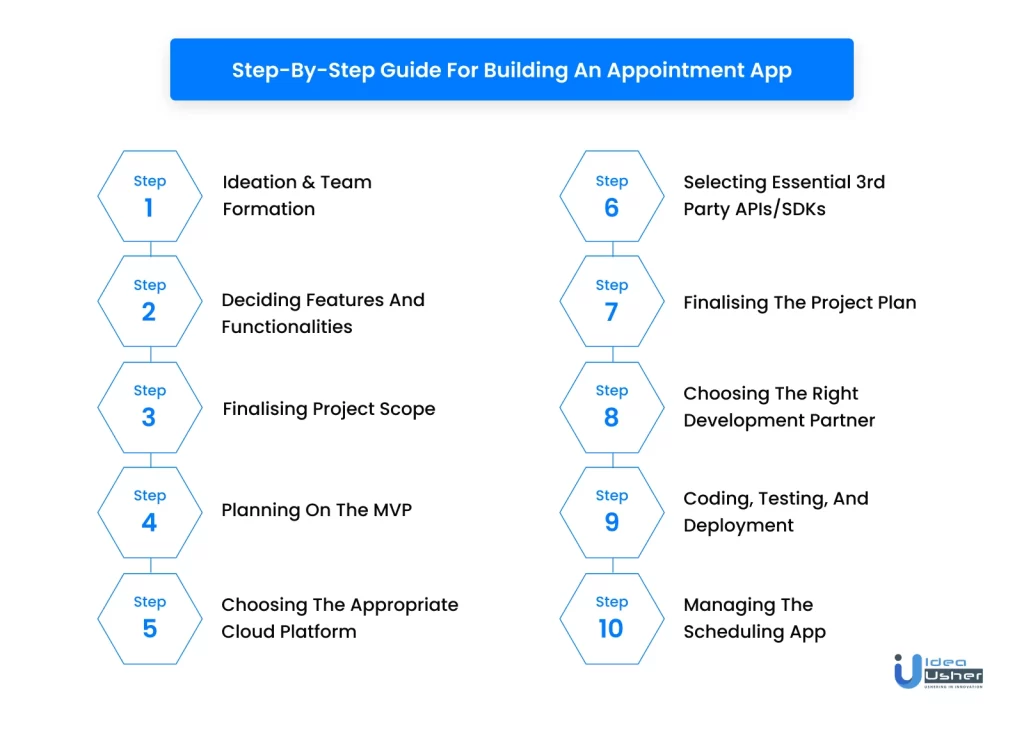
1. Ideation & Team Formation
Before beginning any project, it’s crucial to have a clear idea of what you want to achieve. Ideation involves brainstorming and researching to come up with a concept that meets a specific market need. For an appointment app, the aim is to provide a convenient and efficient platform for users to schedule appointments with service providers.
Once the idea has been established, the next step is to assemble a team to bring it to fruition. A typical app development team includes a project manager, developers, designers, and testers. It’s essential to have a team with a diverse set of skills and expertise to ensure that the project runs smoothly and meets its objectives.
2. Deciding Features and Functionalities
Once the team is in place, it’s time to determine the features and functionalities the appointment app will offer. This step involves identifying the target market’s specific needs and determining the must-have features that will set the app apart from its competitors.
For example, a core feature of an appointment app could be the ability to search for and book appointments with service providers. Other essential features might include appointment reminders, cancellations and rescheduling, payment processing, and customer reviews.
It’s important to strike a balance between offering too many features and overwhelming users and not offering enough features and failing to meet market needs. By conducting thorough market research and considering user feedback, the development team can determine the most important features to include in the MVP (minimum viable product).
3. Finalising Project Scope
With the features and functionalities of the appointment app determined, the next step is to finalize the project scope. This involves several key considerations that will shape the overall direction of the project, like identifying target platforms, and target countries, documenting NFRs, and creating a project specification document.
Decide whether to develop a web app, Android app, iOS app, or a combination of all three.
Next, determine the countries that the appointment app will target. This includes deciding whether to focus on local, regional, or international markets and whether to cater to specific languages and cultural needs.
Next, you should document critical elements such as security, scalability, performance, usability, and maintainability to ensure the app meets the target market’s needs.
Once all the key considerations have been taken into account, the next step is to write a high-quality project specification document. This document should detail all functional and non-functional requirements, target platforms, and countries.
Review the document with all stakeholders and get the necessary sign-off while being flexible enough to accommodate changes during the project.
4. Planning on the MVP
Minimal Viable Product (MVP) is a term used to describe the smallest version of a product that can be launched to the market. It is an essential step in the development process, and it helps the team to validate the product idea and focus on the most critical features. In the case of an appointment app, the MVP should include the core functionalities critical to the app’s success.
Once the core features have been identified, the next step is prioritizing them based on their importance. By focusing on the most critical features, you can also minimize costs and reduce the time to market. Measure the user engagement, satisfaction, and adoption rate to get additional insights into the app’s performance.
5. Choosing the Appropriate Cloud Platform
With the rapid growth of cloud computing, it’s now possible to expedite app development projects using a cloud platform. There are three main types of cloud platforms:
- IaaS (Infrastructure-as-a-Service) cloud platforms are cloud infrastructures that are selectively managed by a few cloud service providers.
- PaaS (Platform-as-a-Service) cloud platforms help manage cloud infrastructures, operating systems, middleware, and runtime environment. They also provide services such as databases and DevOps tools, freeing up the development team to focus on code and data.
- MBaaS (Mobile-Backend-as-a-Service) platforms make developing and managing a mobile backend easier. It takes care of the cloud infrastructure and persistent storage so that the development team can focus on the front end.
There are multiple cloud service providers in the market, including popular providers like AWS, Azure, and Google Cloud Platform. Choose the provider as per your development prerequisites.
6. Selecting essential 3rd Party APIs/SDKs
Integrating 3rd party APIs/SDKs is essential for building an effective appointment app. When choosing APIs/SDKs, there are several factors to consider, including accuracy, ease of integration, and available features. Some of the most commonly used APIs in appointment scheduling include Calendarific, Google Calendar, and SuperSaaS.
Calendarific API provides accurate holiday data for over 230 countries, making it an ideal choice for appointment-scheduling apps targeting multiple regions. This API is a RESTful API and can be easily integrated into the app using API documentation.
Google Calendar API is another popular choice, allowing for the integration of Google Calendar into the appointment app. With step-by-step instructions and API reference documents provided by Google, integrating this API is straightforward.
SuperSaaS API is a well-known online appointment scheduling solution offering integration with payment providers like PayPal and Stripe. The SuperSaaS developer documentation provides all the information needed to integrate this API into the appointment app.
7. Finalising the Project Plan
The next step in the appointment scheduling app development process is to finalize the project plan.
Using the Scrum framework as a guide, your project manager (PM) can perform as a Scrum Master and lead a Scrum development team. The team can then work collaboratively to estimate the app’s features, prioritize them, and schedule them in different sprints to create the project schedule.
The project plan should also address various key aspects, including human resource management, communications management, quality management, risk management, and more.
This helps to ensure that all project requirements are met and that the project runs smoothly from start to finish. By having a comprehensive project plan in place, the development team can stay organized, focused, and on track, making it easier to achieve the desired end result.
8. Choosing the Right Development Partner
To create a high-quality appointment app, you need a team of professionals with the right skills and expertise. Hiring the right developers is crucial to the success of your project.
You need developers with experience in UI design, web development, native Android and iOS development, testing, and DevOps. These developers need to be able to work together as a team to ensure the smooth and successful completion of your project.
Hiring freelancers from freelance platforms may seem cost-effective, but it also involves several risks. They may not have the same dedication and commitment as full-time developers, and they may not allocate sufficient time to your project. They might also not offer management support, making it difficult to keep track of progress and ensure that the project stays on track.
For these reasons, hiring developers from a reputable software development company is highly recommended. Seasoned development companies typically have a team of full-time, highly experienced developers who stay dedicated to your project, provide support, and can aid you with post-development modifications if needed.
9. Coding, Testing, And Deployment
This step can be broken down into six phases.
- Design the UI of the scheduling app:
- Design the web app UI using relevant UI design guidelines
- Use Material Design guidelines for Android app UI
- Follow Human Interface Guidelines for iOS app UI
- Build a robust application security solution
- Implement Multi-Factor Authentication (MFA)
- Use data encryption
- Address key security vulnerabilities (injection, broken authentication, etc.)
- Include security and compliance testing in the CI/CD pipeline
- Develop APIs for the proposed scheduling software
- Design API endpoints efficiently
- Secure APIs with encryption, API gateways, quotas, etc.
- Define effective rules for API requests and responses
- Document APIs thoroughly
- Web App Development
- Use modern IDEs (Eclipse, IntelliJ IDEA)
- Code the web app and integrate APIs
- Test and deploy using DevOps tools from the cloud platform
- Android Development
- Use Android Studio, the popular IDE for Android development.
- Code the app and integrate APIs/SDKs
- Test using tools like Espresso
- Publish the app in Google Play following the Android developer’s instructions.
- iOS Development
- Code the app using Xcode, the preferred IDE by Apple
- Integrate APIs and SDKs into the app
- Test using XCTest
- Submit the app to the Apple App Store using the Apple Developer guidelines
10. Managing the Scheduling App
After successfully deploying the scheduling app, it’s crucial to monitor certain key performance indicators to ensure effective management.
During the development phase, it’s essential to keep track of story points retired, team velocity points, sprint burndown, and errors per 1,000 lines of code. These KPIs provide valuable insights into the progress and performance of the development team.
Once the app is launched, it’s crucial to monitor various product management KPIs like customer satisfaction, customer retention rate, customer churn rate, number of support tickets created, daily active users and monthly active users, session duration, and bounce rate. These KPIs help understand the success and impact of the scheduling app on customers and provide valuable insights into potential areas of improvement.
Monitoring each of these KPIs will help in effectively managing the app, ensuring its long-term success.
Essential Tech Stack for Developing a Scheduling App
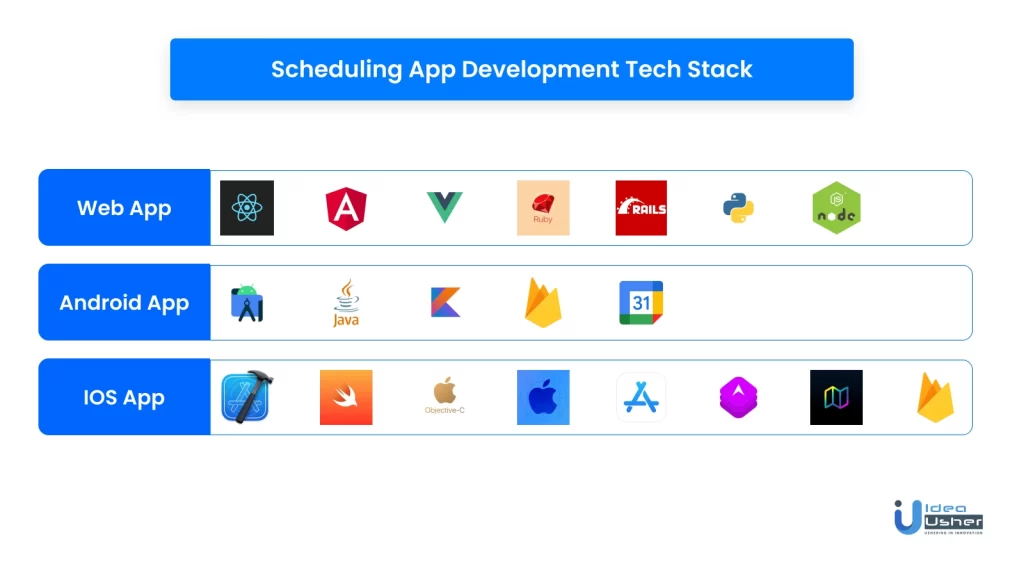
For the web app, you’ll want to choose a powerful framework such as React, Angular, or Vue.js, with a back-end that’s built on a reliable language such as Ruby on Rails, Python, or Node.js. You should also consider using a cloud-based infrastructure for the web app, as this will allow you to scale the app easily in the future.
For the Android app, it’s essential to use Android Studio as your IDE and to have a good understanding of Java, Kotlin, or both. You’ll also need to have experience integrating APIs and other tools like Firebase for push notifications or Google Calendar for effective scheduling/appointment functionality.
For the iOS app, you should use Xcode as your IDE and be familiar with Swift or Objective-C. Familiarity with Apple’s Human Interface Guidelines and App Store review process will also be beneficial. You’ll need to integrate APIs and use tools such as Apple’s CoreLocation and MapKit frameworks, along with push notifications via Firebase or other providers.
Wrapping Up
Building an appointment app requires a systematic approach. Starting from defining the business objectives and defining the target audience to finalizing the project plan and choosing the right development partner. It is crucial to ensure that the development process includes designing the UI, developing robust security solutions, developing APIs, web app development, Android app development, and iOS app development, and finally, managing the app post-launch.
In order to make the most of the investment and ensure that the app is built as per the highest standards, it is advisable to choose a development partner that can guide you through every step of the process. At Idea Usher, we are a team of experts who have a proven track record of delivering successful appointment apps. If you’re ready to start building your appointment app, we’d love to hear from you!
Get in touch with us now!
Build Better Solutions With Idea Usher
Professionals
Projects
Contact Idea Usher at [email protected]
Or reach out at: (+1)732 962 4560, (+91)859 140 7140
FAQs
Q) How do I make my own scheduling app?
To create your own scheduling app, you will need to follow these steps:
- Define your app’s goal and features
- Choose your development platform
- Design your app’s user interface
- Write the code
- Test for bugs and errors and launch your app
- Timely maintain and update your app
Q) How much does it cost to make an appointment app?
The cost of developing an appointment app depends on several factors, such as the features you want to include, the platform you want to develop, the complexity of the app, and the development team you hire. Freelance developers usually cost less, depending on the developer’s experience and location. Small development firms’ cost usually depends on the scope and complexity of the project. Large development companies can be very pricey, directly exponential to their years of existence within the industry, plus other factors.
Q) How to build an app like Calendly?
Follow these 9 steps if you want to build an app like Calendly.
- Research and understand your target market
- Define your app’s features and functionality
- Choose your development platform
- Design your app’s user interface
- Write the code for your app
- Integrate with a calendar API
- Test your app
- Launch your app
- Update and maintain
Q) What is the best app to create a schedule?
As of 2023, the best scheduling apps are Square Appointments, Setmore, Calendly, Zoho Bookings, & Appointy.
